

In this complete guide we will explain how to obtain and install a completely free GoDaddy SSL certificate using Let’s Encrypt as the certificate provider.
This method will allow you to get a godaddy ssl certificate at no cost, although you should bear in mind that it is valid for 90 days, so you will need to renew it by following the same procedure once that period has passed.
1. Generate keys
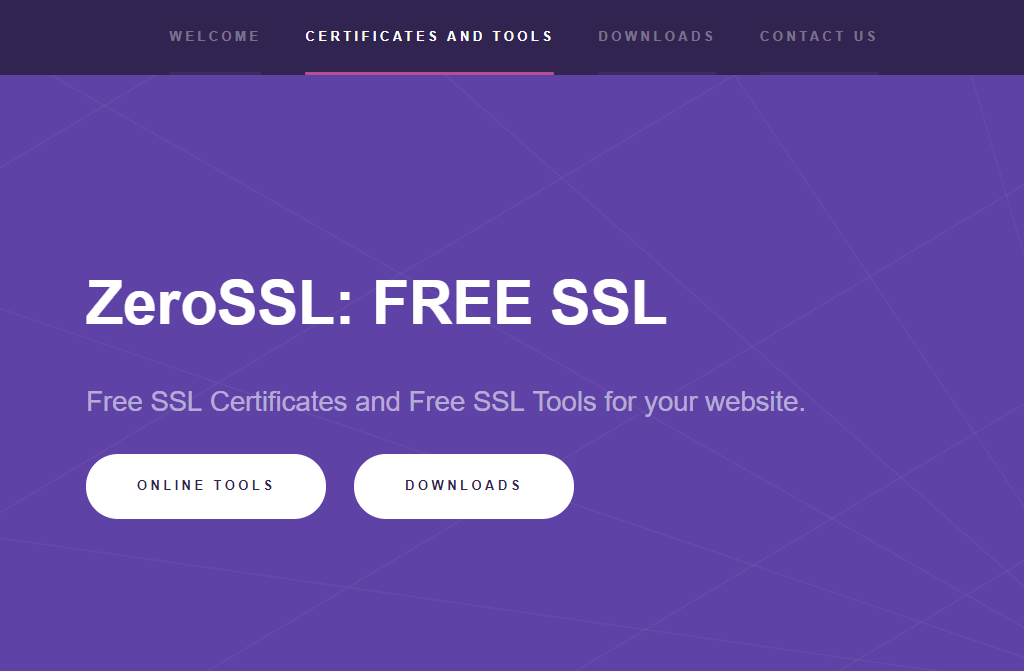
Go to the free online tool Zero SSL and click on Online Tools.
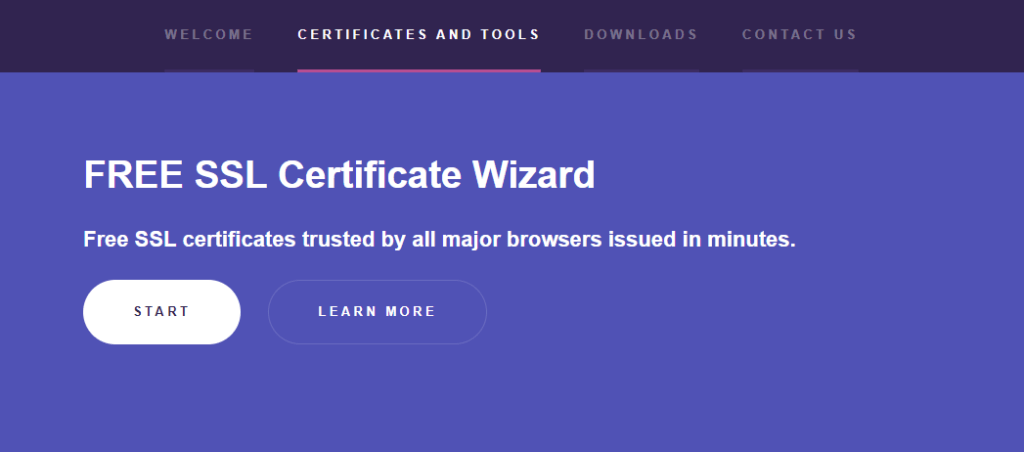
In the Free SSL Certificate option, click Start.
In the Domains text box, type the domain name twice: once as it is and once with www in front. Separate them with a comma.
Also tick the 2 boxes below accepting the terms of use.
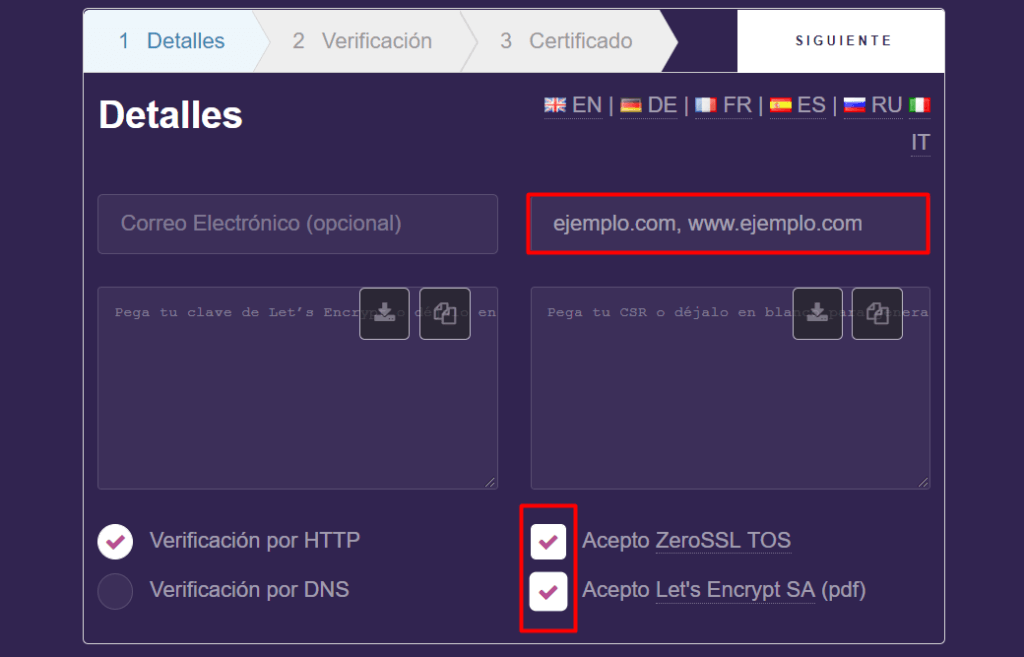
Click the Next button and the CSR (Certification Signing Request) will start to be generated. This may take a minute or so.
Once finished, click the Download button to save a backup copy of this file.
Click Next again and the account key will start to be generated. Again, this may take a minute or two.
Once done, click Download again (now in the key section on the left) and save a backup copy of this file as well.
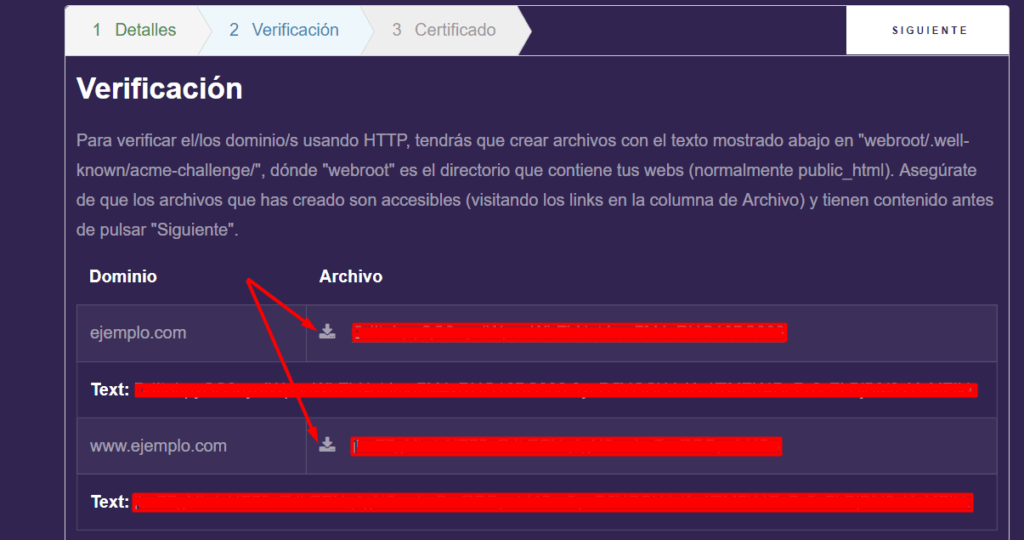
Click Next for the third time and download the 2 alphanumeric key files that have been generated.
2. Verify keys
Now it is time to verify that you really are the owner of the domain by placing the downloaded keys on your GoDaddy server.
We are doing this tutorial for GoDaddy as a generic example, but these instructions are similar whatever your hosting provider is.
In the cPanel administration of your GoDaddy hosting, open the File Manager and go to the folder corresponding to the domain for which you have created the keys.
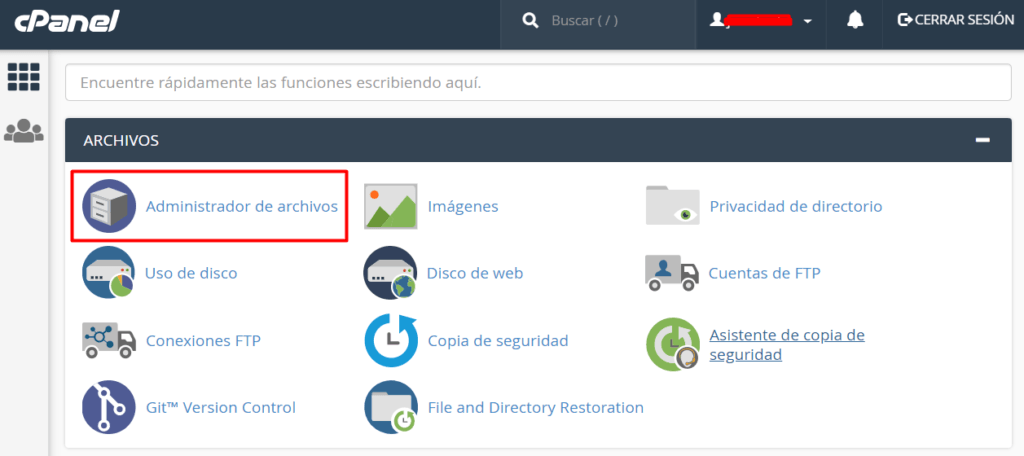
The important thing here is to create a folder called .well-known inside the public HTML folder of the domain in question.
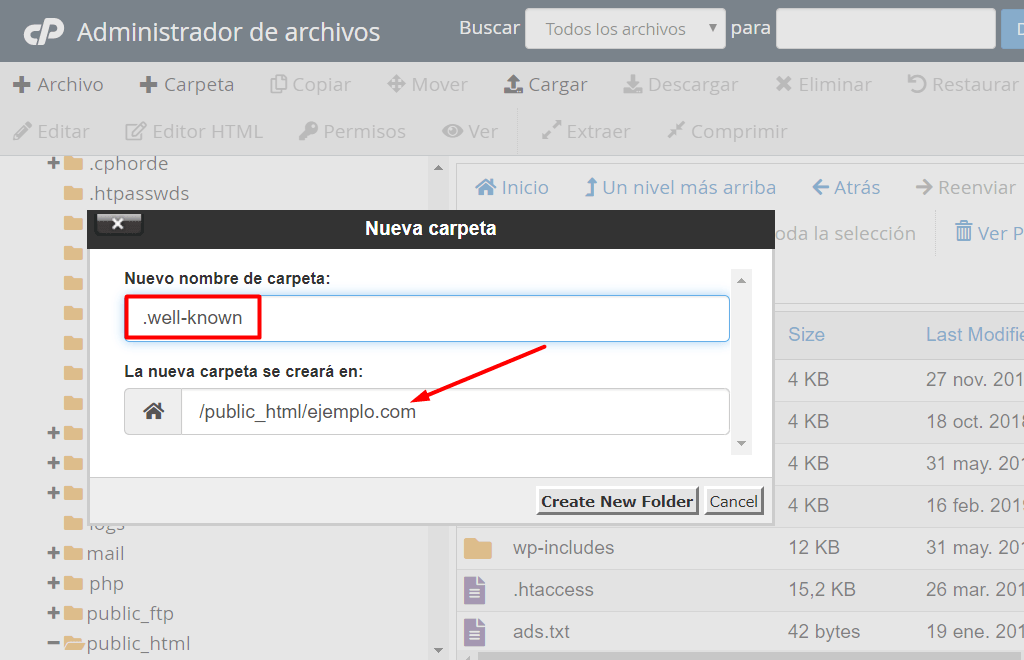
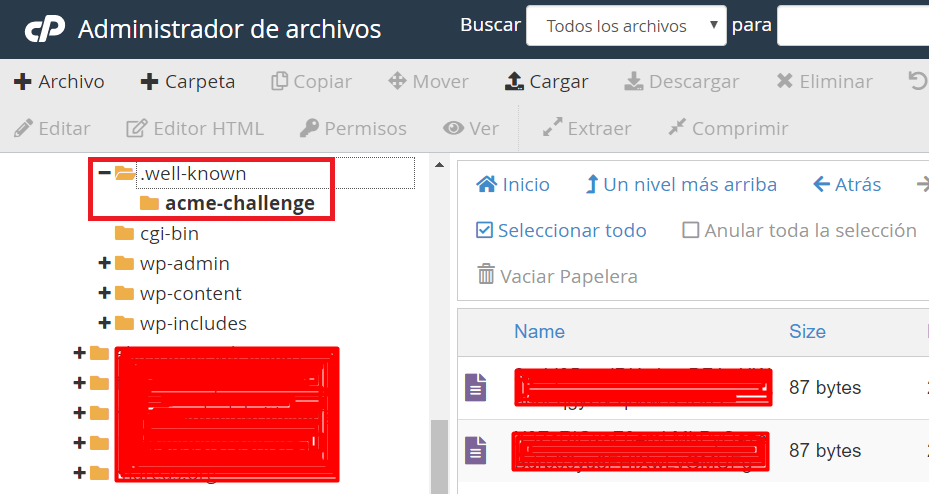
Inside that newly created folder you have to create another folder called acme-challenge.
Once created, you have to upload into it the 2 files with the alphanumeric keys that were generated at the end of Step 1.
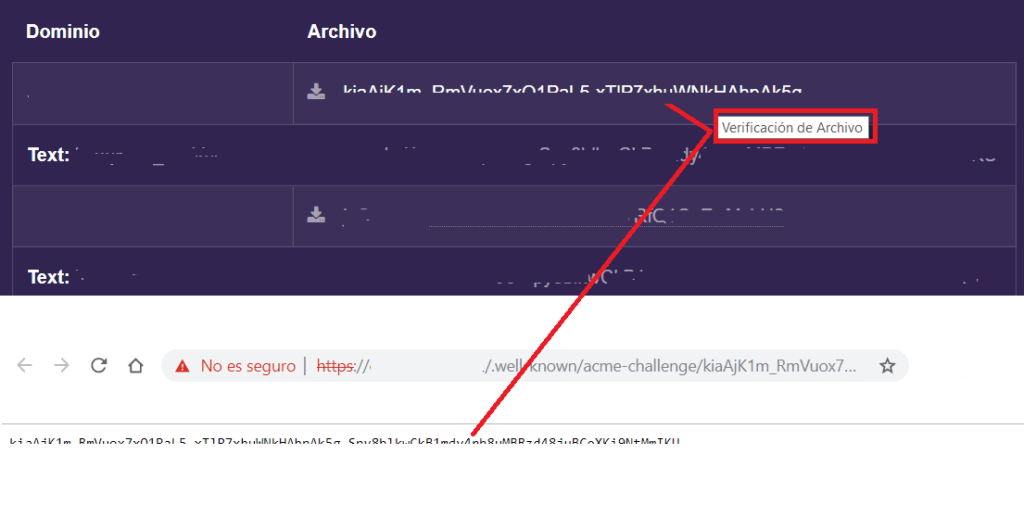
At this point you can check that you have placed the files correctly if you go back to Zero SSL and click on the text of the generated keys.
This will open a tab in the browser and access your domain to check whether that file exists.
If the browser opens correctly and displays the certificate text, the keys have been uploaded correctly.
Once we have done this preliminary check, it is time to click the Next button again in our Zero SSL key generation window.
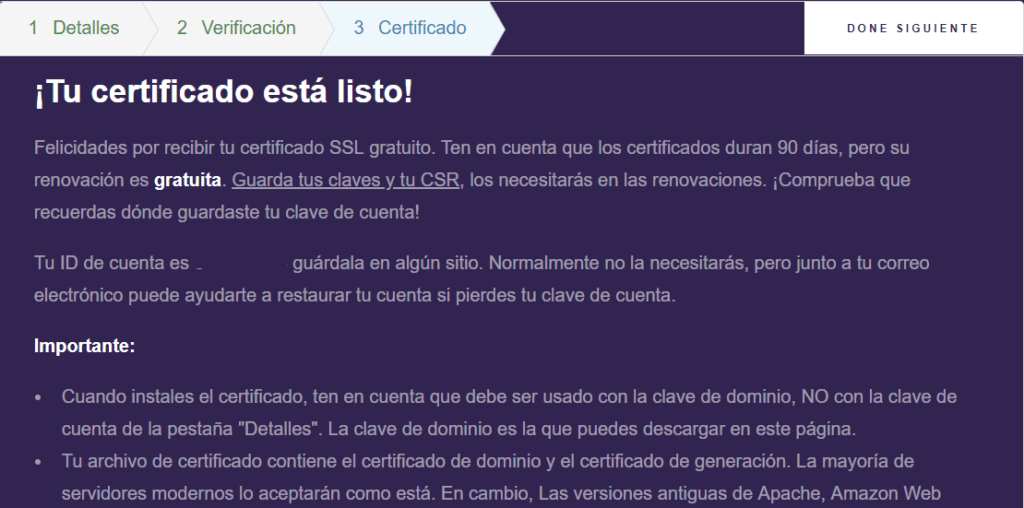
If everything has gone well, the certificate completion screen will appear.
3. Install the GoDaddy SSL certificate
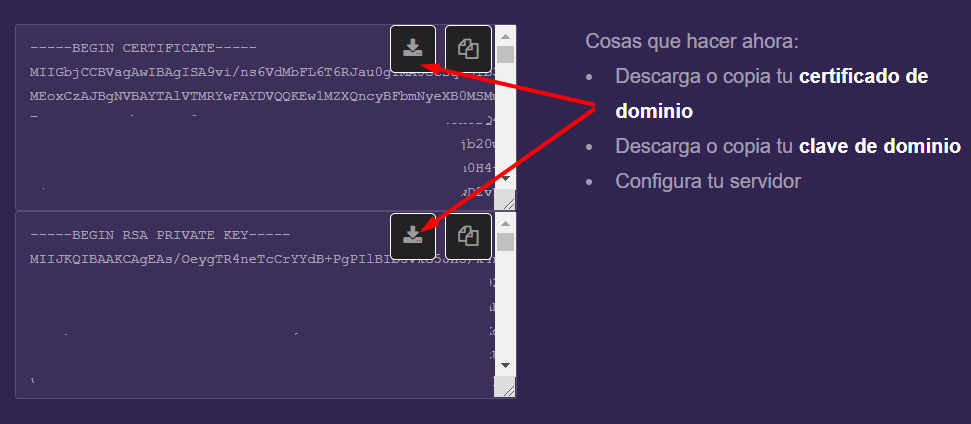
If we scroll down on that certificate completion screen, we will see the 2 certificates that have been generated for our website.
Click Download on each of them to save a backup copy of both.
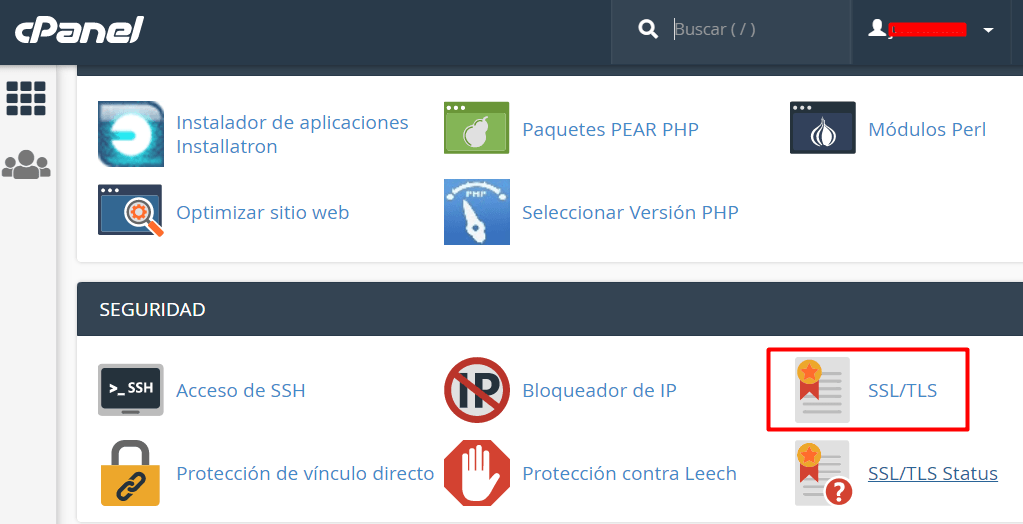
Now go back to cPanel and open the SSL certificate management section to proceed with the installation of the GoDaddy SSL certificate.
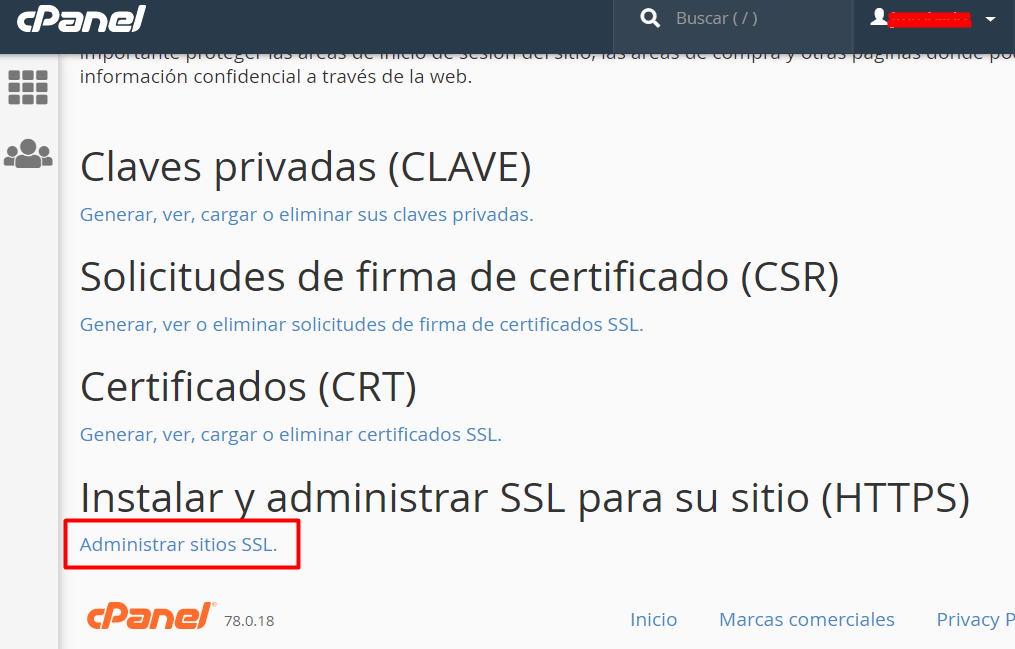
Once in the certificates area, if we scroll down we will reach the place where we are going to install the certificate and key values that we saved at the beginning of Step 1.
First of all, select the domain for which you are creating the certificate in the drop-down menu.
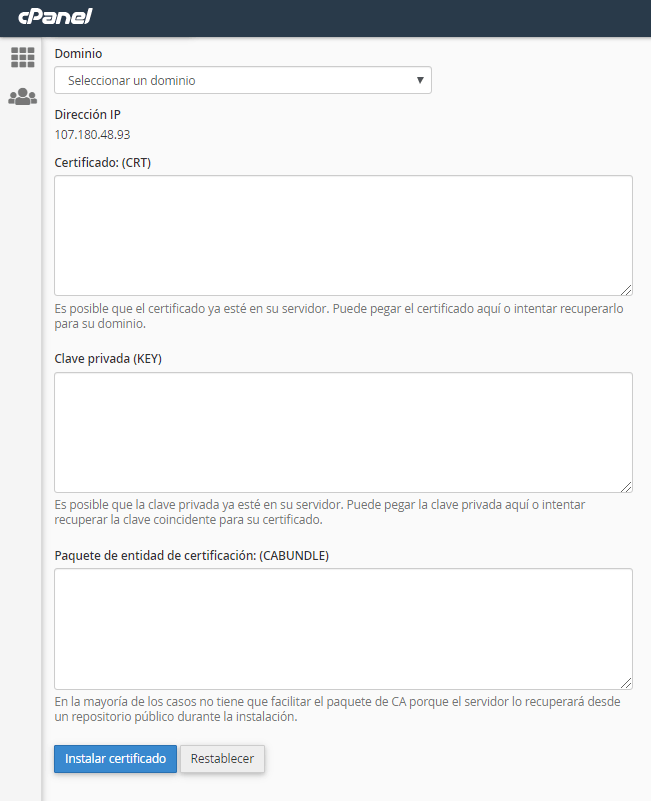
In the Certificate (CRT) box, paste the BEGIN CERTIFICATE text after copying it using the button provided for that purpose on the Zero SSL final certificate screen.
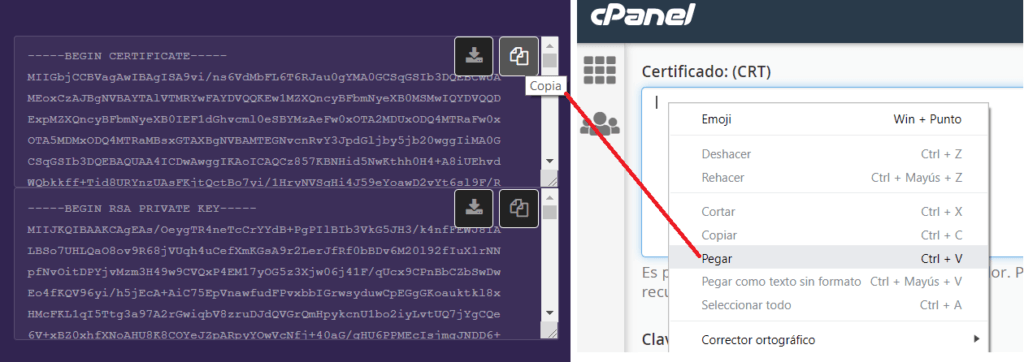
You will see that after pasting, the message Invalid certificate appears immediately. This is normal, since the 2 BEGIN CERTIFICATE blocks have been pasted. You just have to Cut the lower block, leaving the upper one.
Paste the lower block you have just Cut into the third cell called Certificate Authority Bundle (CABUNDLE).
Finally, repeat the operation with the godaddy ssl private key, copying it and pasting it into the Private Key (KEY) field.
With the 3 cells completed you will now be able to click the Install Certificate button in cPanel and, after waiting a few moments, the final process completed window will appear.
4. Send HTTP traffic to HTTPS on your website
If you visit your website you will see that the HTTPS protocol is already installed and that it will be shown as such in the browser bar with the corresponding security lock icon.
However, this only works if a user actually types “HTTPS” in front of your domain name in the browser.
Since what we want to achieve is that all the traffic on our website goes through the HTTPS security protocol, it will be necessary to make that redirect with a little code in the .htaccess file of your website.
It is as simple as editing the .htaccess file (or creating it if it does not exist) and adding these lines of code at the end (you can copy and paste them):
RewriteEngine On
RewriteCond %{HTTPS} off
RewriteRule ^(.*)$ https://%{HTTP_HOST}%{REQUEST_URI} [L,R=301]
Once you save these changes to the file and close it, you will be able to check that no matter how your domain is typed in the browser, it will always redirect automatically to the HTTPS version, having completed the process of installing the godaddy ssl security certificate.